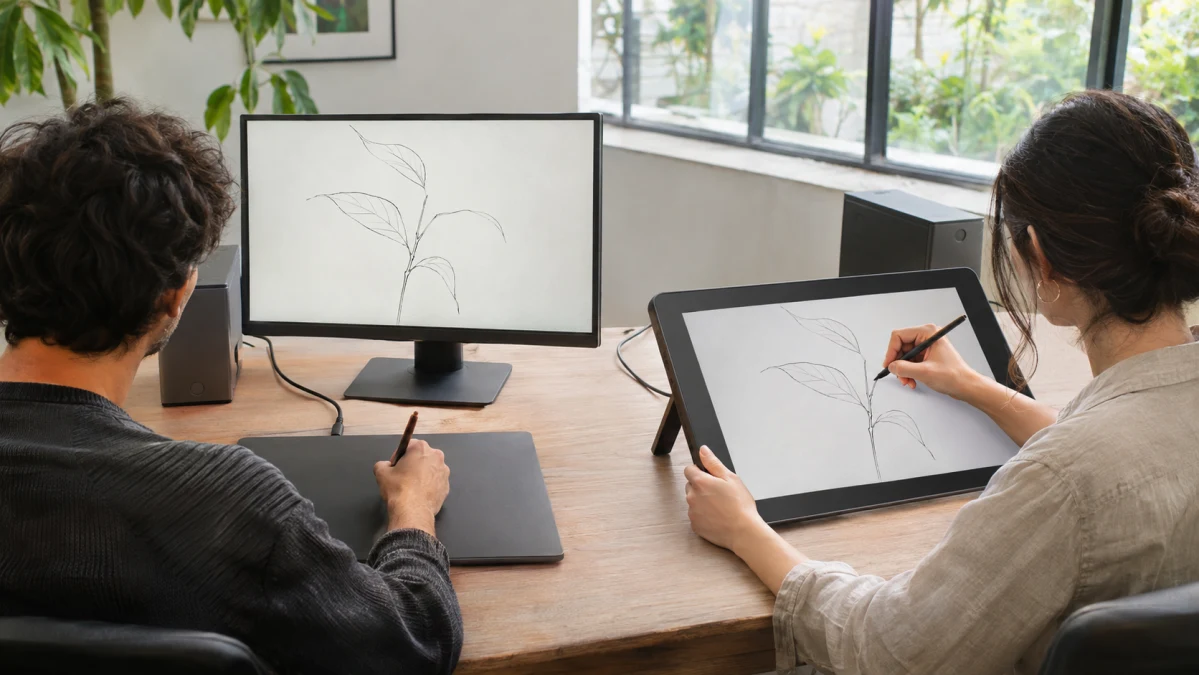
A screenless pen tablet lets you draw on your desk while watching your existing monitor. A pen display puts the image directly under the pen. That difference affects every stroke, where you position your screen, and how much equipment you need to carry.
If you like your current monitor and mainly want to add pen input, start with a screenless tablet. If placing strokes directly on an image feels more natural to you, consider a pen display. Neither format is reserved for beginners or professionals; the useful question is which arrangement suits the work you actually do.
One distinction matters before you spend anything: the XPPen and ASUS pen displays discussed below need a connected device to run your software. If you want to sketch without that connection, you need a standalone drawing tablet.
Screenless tablets: keep your monitor and an unobstructed view
With a screenless tablet, your hand never covers the image. When you paint a selection around an object or work along a photograph’s edge, you can see the entire area you are editing. You can also position the monitor and drawing surface independently: the screen where you want to look, the tablet where you want to rest your hand.
The adjustment is learning to follow the cursor while your hand moves somewhere else. That can feel unfamiliar if you are used to drawing on paper. Try the arrangement before buying if possible, or choose a seller whose return policy gives you a reasonable opportunity to use it in your normal software. A few lines in a demonstration app will tell you less than sketching, selecting, erasing, and reaching for shortcuts during an actual task.
The Portable USB Graphics Drawing Tablet is listed with 8,192 pressure levels, but its generic name leaves more important purchase questions unanswered. Get the manufacturer and exact model number, then check the active drawing area and the manufacturer’s support for your computer. If the seller cannot provide an identifiable model and support page, choose a tablet whose compatibility you can establish before ordering.
Pen displays: put the image under your hand
A pen display lets you place the nib on the line or detail you want to work on. For sketching, lettering, or tracing over a reference, that arrangement may feel more familiar than watching a separate monitor.
It also changes the physical setup. Your hand covers part of the image, and the screen must sit somewhere you can both see and reach comfortably. A large display mounted upright may be pleasant to look at but awkward to draw across; a low drawing angle changes where you direct your gaze.
Pen input and finger touch are separate features. If you want to pinch to zoom or rotate a canvas with your fingers, look for explicit multitouch support and check whether those gestures work in your operating system and drawing app.
XPPen Artist Pro 22 Gen 2: more physical room for drawing
The Artist Pro 22 Gen 2 Graphic Tablet has a 21.5-inch, 2560 × 1440 display, according to XPPen’s specifications. Its appeal is the physical space: you have a larger surface on which to arrange your canvas and tool panels, or make broad strokes.
This is a substantial desk device. XPPen lists its weight at approximately 12.2 pounds with the stand. The official US package includes an adjustable stand and a wireless shortcut remote. The remote gives your free hand a place for commands such as undo or brush-size changes without requiring you to reach around the display to a keyboard.
ASUS ProArt PA169CDV: a smaller, denser screen with touch
The 15.6-inch Pen Display combines a 15.6-inch, 3840 × 2160 screen with Wacom EMR pen input and 10-point finger touch. ASUS lists its weight at approximately 2.36 pounds, making it much more plausible to carry alongside a laptop.
The ASUS has higher pixel density than the larger XPPen: more pixels packed into a smaller surface. That can render fine detail more sharply, but it does not give your hand more room. You may want larger interface scaling to keep menus and buttons comfortable to target, so do not equate a 4K specification with more usable workspace.
ASUS also provides two built-in kickstands for different viewing and drawing angles. Its touch capability is useful only if your software and operating system support the gestures you want; the Windows and Mac distinctions below deserve attention before buying.
Choose the drawing area around how you move
For a screenless tablet, the active area is the part that senses the pen. It can be considerably smaller than the tablet’s outer dimensions.
In standard absolute pen mapping, a location on that surface corresponds to a location on the monitor. Map a smaller tablet area to the same screen, and a short hand movement moves the cursor farther. A larger active area gives you more physical room for long strokes, while a smaller one requires less hand travel. The better fit depends on whether you prefer broad movements or compact ones.
Multiple monitors add another consideration. Mapping a small tablet across an entire extended desktop can make movement feel different from mapping it only to your drawing monitor. Look for driver controls that let you choose the target display and preserve its proportions. Wacom’s mapping documentation illustrates these controls; check that the particular tablet you are considering offers the functions you need.
Aspect ratio matters, too. If the tablet and mapped display have different proportions, movement can be stretched in one direction. Wacom’s Force proportions explanation shows the tradeoff: preserving the correct shape may leave part of the tablet’s surface unused.
For a pen display, judge size with your normal application open. Toolbars, palettes, interface scaling, and canvas zoom all affect how much room remains for the artwork. A bigger screen is useful only if you can comfortably reach the areas you use.
Pressure levels are only one part of pen control
XPPen advertises 16,384 pressure levels for the Artist Pro 22 Gen 2; ASUS specifies 4,096 for the ProArt Pen. Those figures describe reported pressure steps. They do not establish how easy either pen will feel to control.
A separate characteristic is initial activation force: how much pressure starts a stroke. The pressure curve then affects how changes in force translate into the marks your brush makes. Wacom’s pressure-sensitivity explanation distinguishes these characteristics.
If you can try a tablet, draw faint lines and gradually increase the pressure. Check whether you can produce the light and heavy marks you want without changing your grip awkwardly. Also try the pen buttons and your usual erasing method. These are more revealing checks than simply choosing the largest pressure-level number.
Your software must respond to pressure, too. A moving cursor does not prove that the brush is configured correctly. For example, Adobe’s Photoshop guidance includes enabling pressure control in brush settings and checking the tablet driver. Test with a pressure-sensitive brush in the application you intend to use.
Work out the connections before ordering
A pen display needs a picture from the computer, a data connection for pen input, and enough power to operate. Some setups combine those functions in one cable; others do not. A USB-C connector’s shape alone tells you too little.
XPPen requires its power adapter in either connection setup
The Artist Pro 22 Gen 2 manual documents two routes:
- USB-C: a suitable port and cable carry video and pen data together.
- HDMI plus USB: HDMI carries the picture, while a separate USB connection carries pen data.
Both routes require the external power adapter. Allow for the power brick and an available outlet even if your computer supports the USB-C connection.
ASUS can use one USB-C cable, with a brightness compromise
The PA169CDV manual allows a single USB-C connection when the computer’s port supports DisplayPort Alt Mode and supplies at least 15 watts.
Without the external adapter, ASUS limits the display to 180 nits. That is a meaningful tradeoff if you want fewer cables but work somewhere brightly lit.
With HDMI, you still need a USB data connection for pen and touch. HDMI plus the power adapter can produce an image while leaving those input functions unavailable.
For either display, check the computer’s specifications and any dock or adapter you plan to use. Confirm the supported video resolution, USB data connection, and power arrangement together.
Check pen support separately from monitor support
XPPen documents Windows and macOS operation and provides driver-installation instructions. On a Mac, its manual calls for granting Accessibility permission to PenTabletDriver. If you use a managed work computer, check whether you can install the required software and grant those permissions.
ASUS’s manual describes pen and touch setup for Windows 10/11, while its ProArt Creator Hub software is Windows-only. Mac buyers should obtain explicit confirmation of pen-pressure and touch support for their intended software before choosing the PA169CDV. Compatibility as an external monitor does not establish those drawing features.
Make room for your keyboard, cables, and free hand
Before buying a large pen display, mark its outer width and depth on your desk with paper. Add space behind it for the stand and cables, then place your keyboard where you would actually use it.
Can you reach undo, change tools, and type without repeatedly moving the display? Can you reach the far side of the canvas without leaning forward? These questions matter more to the installed setup than the advertised screen diagonal.
A screenless tablet offers more freedom to separate viewing height from hand position. A pen display ties those positions together, making stand adjustment more important. Neither arrangement guarantees comfort; test the position you would use for a full session.
For travel, count everything that goes in the bag: tablet or display, laptop, pen, cables, and any required adapter. The ASUS’s lower weight and conditional single-cable operation are useful advantages over the large XPPen, but it remains an accessory to a connected device.
Spend on the setup you will actually use
Screenless tablets typically cost less than pen displays. If you already own a compatible computer and a monitor you like, adding a screenless tablet avoids purchasing another screen.
Compare complete packages before deciding how large the price difference really is. Include any necessary adapter, stand, or software purchase, but do not add accessories twice: XPPen’s official US package already includes its stand, remote, power supply, and connection cables. Check the package offered by the seller you will use.
Also check replacement-pen and nib availability, along with the return policy. A low purchase price is less appealing if a lost pen is difficult to replace or you cannot return a device whose drawing arrangement does not suit you.
Choose a screenless tablet when you want pen input while keeping your existing monitor and an unobstructed view. Choose a pen display when drawing directly on the image is valuable enough to justify its cost and desk space. Between these two displays, the XPPen favors a larger drawing surface at a fixed workstation; the ASUS favors a smaller, sharper screen that is easier to carry, with touch and operating-system compatibility requiring particular attention.