
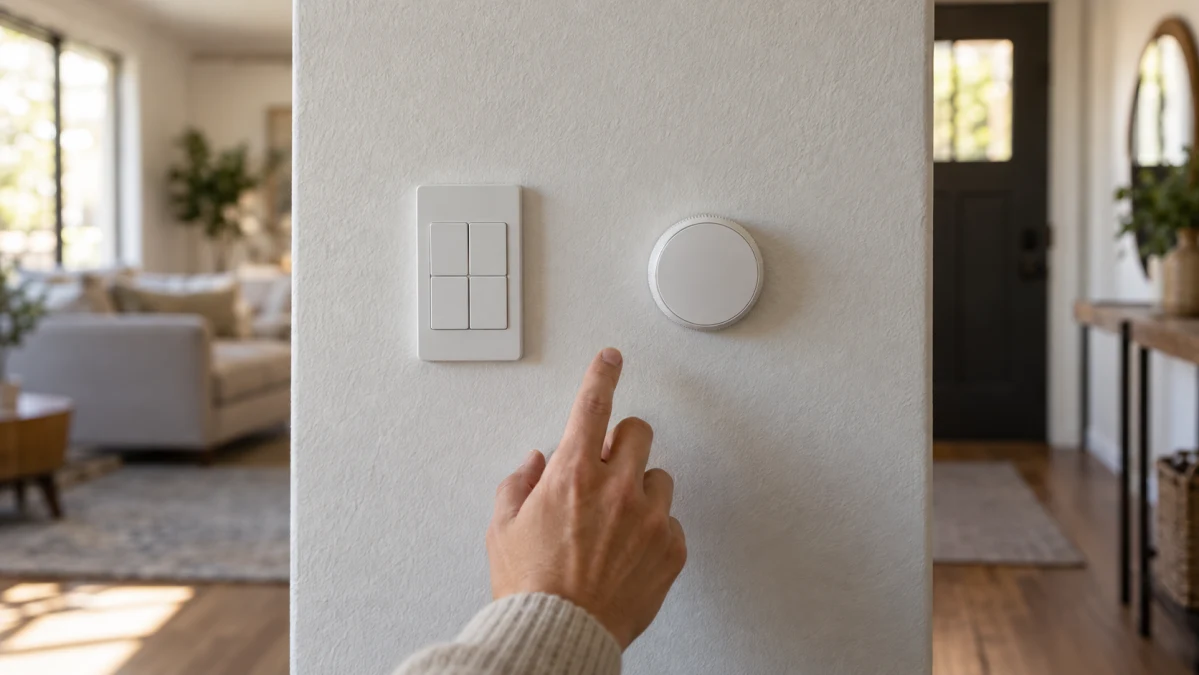
A multi-button wall scene switch makes sense when you want a few familiar actions in predictable places: reading lights on one button, movie lighting on another, everything off on a third. A smart knob controller is a better fit when you keep adjusting the same light or room and would rather turn a dial than reach for your phone.
Think presets versus adjustment, not “more buttons versus more features.” The useful question is what you want to do without thinking—and whether the controller can do it in the smart-home system you already use.
First, don’t confuse a scene remote with a wired switch
A device can look like a wall switch without switching your home’s electrical wiring. MOES’s battery-powered scene switch, for example, is a wireless controller that requires a gateway in the manufacturer’s setup. It sends instructions to compatible smart devices; it does not, by itself, make an ordinary ceiling light remotely controllable.
If your goal is to replace a wired switch and directly control an ordinary light, you need a switch or dimmer designed and rated for that electrical load—not simply a product with “scene switch” in its name.
Smart bulbs present the opposite problem: they already have wireless control, but they still need power. Turn off their electricity at the old mechanical switch and a scene remote cannot wake them. Philips Hue addresses this with accessories that keep the existing switch in the on position. Decide how people will use the original switch before adding another control beside it.
Multi-button switches: put everyday actions on single presses
The strongest argument for several buttons is not that you can program an elaborate control scheme. It is that you don’t have to.
For a shared living room, a layout such as Bright, Reading, Movie, and Off is a useful starting point. Give each its own single press, where your app supports those assignments. Use readable labels or consistent positions so someone who didn’t build the automations can still turn on the lights.
When comparing controllers, look at the actual button area, spacing, and room for labels. Four distinct controls are worth more when you can tell them apart without studying the panel.
Be skeptical of scene counts as a measure of convenience. MOES markets its four-button version as a 12-scene controller. Its scene-switch manual describes three actions per button: a single click, a double click, and a five-second hold. That is four single-press choices plus eight additional gesture assignments—not 12 separate buttons.
Those extra assignments can be useful, but reserve them for secondary jobs. Holding a button for five seconds might be acceptable for an occasional routine. It is a poor place to hide the main room lights. Count the actions you need on single presses first; treat the rest as spare capacity.
Also give yourself an obvious way back from a preset. In Home Assistant, scenes apply saved device states rather than having their own off state. A button assigned to recall Movie does not inherently undo that scene when pressed again. Program an Everyday or Off action instead of assuming the next press will restore the room.
A multi-button controller is therefore the better starting point when your daily choices are distinct and repeatable. You don’t need a dial just to choose among three brightness levels you already like.
Smart knobs: better for “a little brighter” or “a little dimmer”
At a desk or beside a reading chair, a dial earns its place when you want to adjust the light rather than select a preset. A sensible target is simple: press for on/off, turn for brightness.
Keep that basic interaction intact when comparing features. Extra gestures are less valuable if ordinary dimming requires remembering whether to hold the knob, double-click it, or change modes first.
The operating mode can change what the same hardware sends. In Zigbee2MQTT’s documentation for the Tuya ERS-10TZBVK-AA, command mode maps rotation to brightness-up and brightness-down steps, with a single click sending a toggle command. Event mode instead reports left rotation, right rotation, and several press actions for automations to interpret. These are relative commands or direction events, not an absolute dial position corresponding to a particular brightness.
Event mode does not mean a knob cannot dim lights. An automation can translate rotation events into brightness changes—for example, by using Home Assistant’s lighting actions. But that behavior needs to be configured. The distinction is between a lighting-oriented command and an input you must connect to the desired result, not between “dimming possible” and “dimming impossible.”
Before keeping a knob, try it with the light you intend to control. Make a small adjustment, turn it quickly, then stop. Does the light follow your movements without overshooting? Can you comfortably switch it on at night? Do you get useful control near the dim end of its range? These are better tests of the purchase than a long list of supported gestures.
Be equally specific about anything beyond brightness. Buying a knob for speaker volume or another adjustable setting requires a working automation or integration for that particular device. The shape alone does not make it a universal control.
Buy for your existing system, not just the Zigbee logo
Compare the cost of a working setup, not just the remote. Add any required hub, radio adapter, and mounting accessories before deciding which option is cheaper. An inexpensive controller that introduces another hub and app may be poor value for a single room.
For Home Assistant, find out whether the claimed support is through ZHA or Zigbee2MQTT. They use different device-support code. Home Assistant’s ZHA documentation explains that some devices can pair successfully without exposing all the expected functions. Seeing a controller—or its battery level—in an app is not enough.
Ask a concrete question before buying: “With this model and my hub, can each button trigger a different scene?” Or: “Can rotation adjust these lights, and what setup does that require?” Look for instructions showing that task with your intended integration and operating mode.
For straightforward app-based setup, favor a documented configuration over a general promise that the controller is programmable. The ability to build a solution is not the same as having one ready to configure.
Internet outages and hub failures are different problems
A wireless controller should not become useless merely because your internet connection drops—but you need to know where its routines run.
MOES’s scene-switch manual says previously configured routines can execute without external internet when the app identifies them as local linkages. The gateway still carries out those routines. In that arrangement, “local” means independent of the internet, not independent of the gateway.
Some compatible Zigbee controllers and lights can also use binding: a direct control relationship between the remote and a bulb or lighting group. Zigbee2MQTT’s binding guide explains that this can keep supported controls working when the home-automation software or coordinator is down. Not every device supports it, so look for a documented combination rather than assuming any Zigbee knob or button has this fallback.
Direct lighting control also does not make a separate, more elaborate automation hub-independent. A bound dimming command and a routine that coordinates several other integrations are different jobs.
For everyday room lighting, make offline behavior part of your purchase decision. During the return window, test your actual controls with the internet disconnected while leaving the hub and lights powered. That answers a more useful question than whether the package says “Zigbee.”
Choose the mounting arrangement separately from the controls
“Wall switch” and “knob” do not necessarily mean fixed and portable. MOES says its battery-powered wall controller can be attached with double-sided tape or used as a handheld remote; it uses a CR2430 battery.
For a shared room, give the controller a predictable home even when it is removable. For a bedside or desk knob, check whether you can turn it comfortably with one hand without the whole unit moving. A controller that needs to be picked up and steadied may not suit the spot you had in mind.
Before attaching anything permanently, try the controls from the position where you will actually use them. Check reach, visibility in low light, and the space around the buttons or dial. Look at how the battery compartment opens, too: replacing a battery should not require undoing your mounting arrangement. Confirm the battery type and whether it comes in the box rather than assuming every similar-looking controller uses the same cell.
The best choice—and when to buy both in one device
For a shared control by the door, favor a multi-button switch with a few obvious single-press assignments. For a light you regularly fine-tune from a chair, desk, or bed, favor a knob with a documented dimming setup for that light.
You do not have to choose one interaction exclusively. The Philips Hue Tap dial switch combines four configurable face buttons with a dimming dial and can be wall-mounted or used as a remote. A Hue Bridge is required to customize how it controls your lights. That makes it worth considering for an existing Hue setup that needs both presets and adjustment, rather than as a reason to add a new lighting ecosystem for one accessory.
Start with the simplest interaction that covers your routine. Put familiar lighting choices on buttons. Put frequent brightness adjustments on a dial. Leave clever gestures for the things nobody needs to figure out in a dark room.