
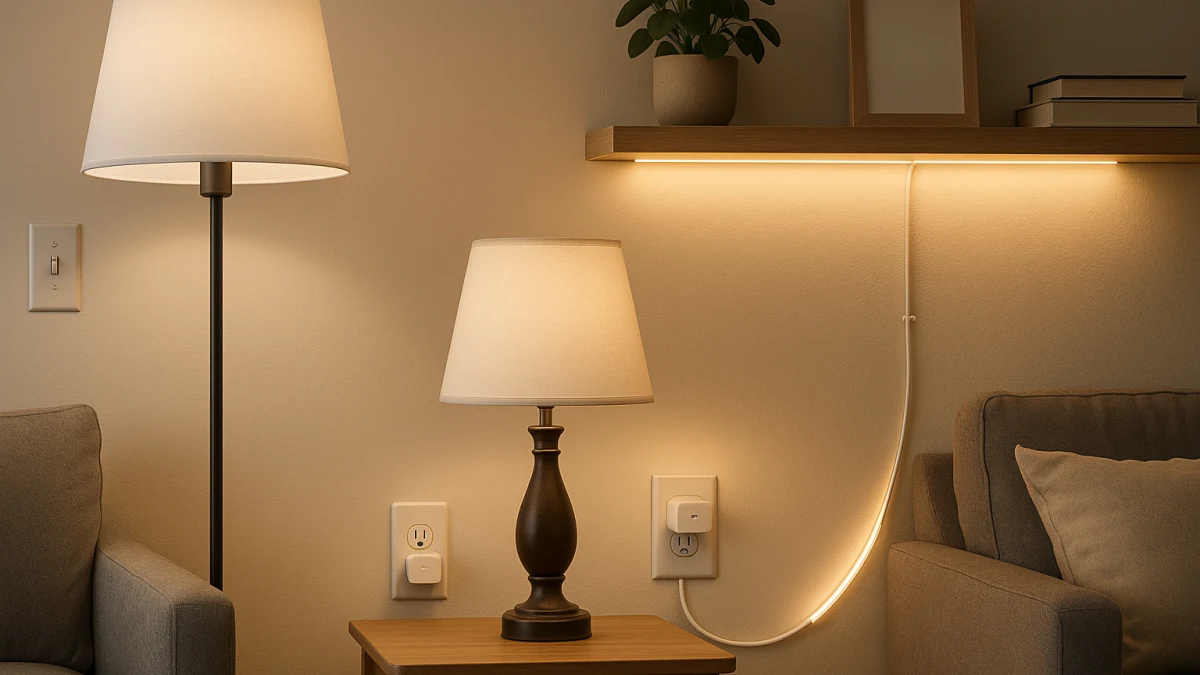
A renter-friendly smart lighting upgrade starts with the power path the room already gives you: a bulb socket, a plug-in lamp cord, or an outlet close enough to power an accent strip. That matters more than starting with a brand or app, because each path solves a different problem and fails in a different way.
This collection is meant to clean up the boundary between products that can usually be removed later and products that move into wiring or fixture changes. Smart bulbs can add per-bulb lighting control when the socket and fixture fit. Smart plugs are simpler on/off automation for lamps. LED strips create new accent or task light, but only if the outlet, cord route, length, and mounting surface make sense. Hardwired smart switches are included only as an exception, not as a no-wiring shortcut.
Choose by what already powers the light
| Room condition or goal | Better fit |
|---|---|
| The fixture already accepts replaceable bulbs and you want per-bulb dimming, color, tunable white, scheduling, app control, or voice operation. | Smart light bulbs |
| The light is a table lamp, floor lamp, or plug-in decorative light and simple on/off scheduling is enough. | Smart plugs for plug-in lamps |
| You want accent or task lighting under shelves, behind furniture, at a desk, or around a TV area, and you can plan an outlet route. | Smart LED strip lights |
| You are trying to control a fixture from the wall and are considering voltage, load rating, neutral-wire requirements, or wall-plate compatibility. | Hardwired smart switches with approval, treated as a boundary case |
Before comparing products, check five things: the existing power path, the depth of lighting control you want, how reversible the setup needs to be, where power cords or adapters will be visible, and whether the product works with your bulb base, load rating, app, hub, Wi-Fi, Bluetooth, Matter, or voice-assistant setup.
Start with the power path you already have
- Socketed fixture: Start with smart bulbs. Match the base and shape first, then compare brightness, dimming, color, tunable white, and platform support.
- Plug-in lamp or decorative light: Start with a smart plug if turning the whole lamp on and off by schedule, timer, app, or voice is enough.
- Bare surface near an outlet: Start with LED strips if you can plan the strip length, cut points, adhesive mounting, adapter or USB power, and visible cord route.
- Wall-switch control: Pause before treating this as no-wiring. A smart switch can involve line-voltage wiring, load limits, neutral-wire requirements, and wall-plate fit.
The no-wiring line: no fixture swaps or wall-switch replacements
This page focuses on indoor lighting changes that do not require replacing a fixture, installing hardwired under-cabinet lighting, or swapping a wall switch. Those adjacent projects may be valid in the right situation, but they are not the core renter-friendly path here.
That also means a product being smart-home compatible is not enough by itself. The question is whether it uses an existing socket, an existing plug-in lamp cord, or a nearby outlet without changing household wiring.
Smart bulbs: the socketed-fixture path, if the switch stays on
Use this path when the fixture already accepts a replaceable bulb and you want the bulb itself to become the controllable part. Start with the physical fit: base type and bulb shape matter. Product listings may show A19, BR30, E12 candelabra, MR16, ST19, candle shapes, E26, GU5.3, or similar fit details, and those details decide whether the bulb belongs in your fixture before any app feature matters.
Then compare the lighting features that are actually listed. Some smart bulbs advertise app dimming, schedules, RGB or color changing, tunable white, Wi-Fi, Bluetooth, Matter, voice-assistant support, or no-hub setup, but those should be treated as product-specific features. Also check brightness, voltage, hub requirements, supported apps, and whether the product page says anything about enclosed shades, dimmer switches, damp locations, or outdoor use if those conditions apply.
Read the products shown here as a pool of socketed smart LED bulbs to inspect, not as interchangeable replacements for every fixture. Choose this lane when you want bulb-level control. If the lamp is plug-in and you only need the whole lamp to turn on and off, a smart plug may be simpler. If the room lacks a useful fixture where you want light, an LED strip may solve the placement problem better.
The wall-switch-off problem for smart bulbs
The easiest smart-bulb mistake is forgetting that the fixture still needs power. If someone turns the wall switch off, app and voice control can be unavailable until the switch is turned back on.
That does not make smart bulbs a bad renter option; it just changes where they work best. They fit fixtures where the wall switch can stay on, where household members understand the setup, or where the fixture is controlled in a way that keeps power available to the bulb.
Smart plugs: simple on/off automation for plug-in lamps
A smart plug is the cleanest fit for a table lamp, floor lamp, or plug-in decorative light when the job is scheduling, timers, app control, or voice-compatible on/off power. Before connecting a lamp, check the product page for maximum load, amperage, wattage, indoor-use notes, plug size, number of outlets, hub requirements, app support, and US-market 120V-style compatibility signals. Ratings such as 15A or 1800W may appear on some products, but the connected lighting load should stay within the manufacturer’s stated rating.
Use the products shown here when one plug-in light should behave as a single controllable unit. Do not expect a basic lamp bulb to gain color changing, tunable white, or brightness control just because the plug is smart. Dimming only belongs in this lane when the specific plug and lamp setup explicitly support it.
Outlet, plug size, and visible-cord check before strips
Before moving from lamp control to strip lighting, look at the actual room: where is the outlet, what else is plugged in, and will the plug or adapter block nearby receptacles? For LED strips, also trace the cord path from outlet to mounting surface before buying.
Measure the run you want to light and compare it with the strip length and any listed cut points. A strip that is technically no-wiring can still be a poor fit if the adapter is in the wrong place, the cord has to cross a visible wall, or the remaining length cannot be managed cleanly.
Smart LED strips: accent light that still needs an outlet plan
Choose this path when you are creating light in a place that does not already have the right fixture: under shelves, behind furniture, at a desk, around a TV area, or along a similar indoor accent or task-lighting surface. The decision is less about bulb shape and more about layout. Check length, cuttable sections, included adapter, USB or low-voltage power, corded route, and whether the product is intended for indoor use.
Mounting deserves its own check. Product pages may mention adhesive, self-adhesive backing, or 3M adhesive, but removal depends on the product, adhesive, surface, installation time, and instructions. Compare control methods too: some strips use a remote, some list app control, Bluetooth, Wi-Fi, RGBIC, dimming, tunable white, or voice-ecosystem compatibility, and some are much simpler.
Read these products by placement first: length, power source, mounting method, and control type. LED strips are the right no-wiring direction when you want to add a new light location, not just automate an existing lamp or fixture. If you cannot find a practical outlet route or are worried about the mounting surface, a smart bulb or plug-in lamp may be the lower-friction choice.
If the solution is a wall switch, treat it as an exception
A wall switch can look like the elegant answer because it controls the fixture from the place people already use. For this renter-focused page, that is exactly why it needs a boundary. Smart light switches, smart Wi-Fi light switches, wall-switch dimmers, wire leads, wall plates, 100–120V or 120V specs, load ratings, and neutral-wire requirements all point toward an installed electrical-control product rather than a reversible bulb, plug, or strip setup.
Wireless scene buttons, battery remotes, controller-only products, knobs, ceiling-fan switches, and faceplates are also not the same decision as the three no-wiring lighting paths above.
Hardwired smart switches: the approved exception, not the renter shortcut
Consider this section only if you are deliberately evaluating an approved hardwired change. Smart switches and wall-switch dimmers may control fixtures at the wall, but they raise installation questions that bulbs, plugs, and LED strips avoid. If you are looking for a no-wiring renter upgrade, go back to the socket, plug-in lamp, or strip-light surface first.
Use the products shown here as a reference for the kinds of specs that make a switch different: voltage, load rating, neutral-wire requirements, circuit type, wall-plate compatibility, wire leads, and supported smart platforms. This is not a step-by-step installation lane and should not be treated as a co-equal shortcut for renters.
Final renter-lighting sanity check: base, load, length, surface
Before choosing, run the decision through the part that can actually fail:
- Smart bulb: Confirm base type, bulb shape, brightness, voltage, fixture fit, hub or app requirements, and whether the listed features include the dimming, color, tunable white, Matter, Wi-Fi, Bluetooth, or voice support you want.
- Smart plug: Confirm indoor-use fit, plug size, number of outlets, app or voice ecosystem, Matter or Wi-Fi support if needed, and the manufacturer’s load rating for the lamp or decorative light you plan to connect.
- LED strip: Confirm length, cut points, adapter or USB power, low-voltage or corded power route, control method, indoor-use intent, adhesive or mounting method, and whether the surface is appropriate under the product instructions.
- Hardwired switch exception: Confirm that you are intentionally outside the no-wiring path, then review voltage, load rating, neutral-wire requirements, circuit type, wall-plate fit, and platform support before going further.
Use product instructions for loads, adhesive, and permission-sensitive claims
Electrical ratings, adhesive removal, surface compatibility, and rental permission are product- and situation-specific. Use the product page and manufacturer instructions for load limits, installation requirements, adhesive handling, and removal guidance. Do not assume a smart plug supports any lighting load beyond its stated rating, or that an LED strip will remove cleanly from every painted, finished, or textured surface.
For most renter-friendly lighting upgrades, choose the least invasive fit for the light you already have: socketed smart bulb first, smart plug for a plug-in lamp second, LED strip when the outlet and surface plan work, and hardwired switches only as an approved exception.